The 2CV lived outside for a while which caused untold rusting. Therefore the only course of action was yet another rebuild. Check out the latest rebuild photos on Flickr.com.
Fitting a new chassis to a 2CV
March - April 2002, by Andrew Todd
|
 |
I bought this 1986 2CV Sp�cial from a family friend for �50, with the proviso that it needed a new chassis.
It was basically sound, so I decided that if I ordered a new chassis, I could put my DS project on hold for a few weeks and
get the car sorted for minimal outlay. It could then be used by my fianc� Clare as a summer car, instead of her usual BX.
|
 |
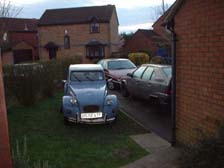
We picked the car up from my Dads house in Newcastle where it had been stored for 6 months. |
 |
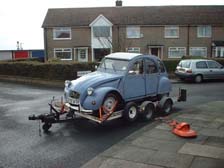
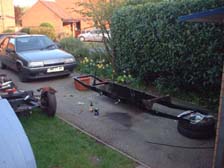
We picked probably the worst weather possible for towing - this was March 2002 on the A1 at Ripon!
Thankfully the XM had no trouble hauling a 2CV around... (Yes, that is snow!)
|
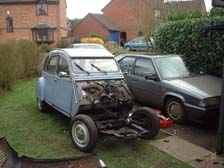 |
The first job was to remove the engine. This is held in place by two bolts at the rear of the transmission, and two engine
mountings at the front of the car.
I thought that this was going to be a nasty job, but after unbolting everything, I managed to lift the engine out on my own.
Clare and I then dragged it into the back garden, where it was stored under the picnic table!
|
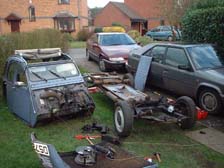 |
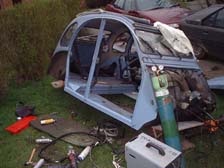
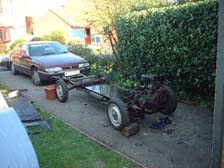
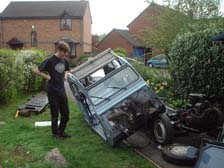
Next I had to remove the body from the old chassis. This is held in place by numerous bolts; again I thought it would be tricky, but
after a little rocking, the body lifted away from it's mountings, and came off.
I put it on axle stands on my garden. Oh the neighbours love me....
|
 |
With the body seperated, I began the weldathon.
There were numerous places that required new metal - I didn't want to spend much on it, so I settled for cutting the old rust out
and welding patches in place, rather than replacing the panels.
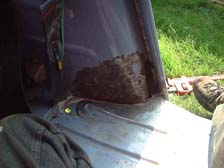
The first place was the rear seat belt mounts. These always rot, so I made up patches. Here you can see a rotten mount point.
|
 |
Here you can see that both of the belt mounts have been welded.
|
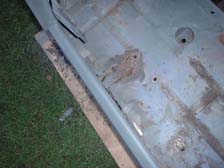 |
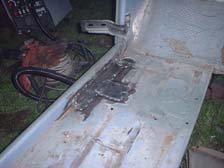
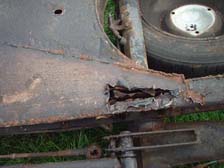
Next I looked at the floorpan. There were numerous holes, which all needed patching. Here you can see a large area of rot on the passenger side.
|
 |
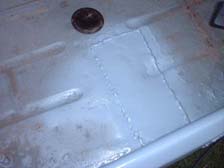
Here is the same area after welding. You can also see some more patches welded in place in this photo.
|
 |
The drivers footwell also needed welding.
|
 |
The sills were generally OK, but this one needed a small patch
|
 |
The righthand side is now finished, about a weeks work.
|
 |
I spent a weekend on the left hand side, you can see it finished here.
|
 |
With the body ready, I ordered the new chassis from 2CV City.
It arrived at work and I transported it home in the back of a transit van and put it on the picnic table in the garden.
Although it was already galvanized, I decided to paint it in Hammerite. Once done, I put it on stands on the drive ready to transfer the parts.
|
 |
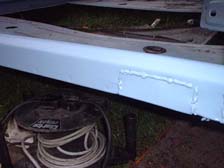
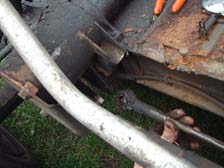
The first job was to transfer the running gear; however I encountered a problem here. The 4 bolts which hold the rear axle on had a plate
welded over them. I ground the plate away to find that the bolts underneath were still pristine! They came out quite easily with a little PlusGas.
|
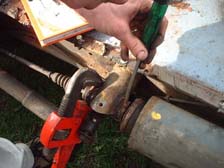 |
The biggest problem I encountered with the whole job, was removing the suspension. Basically the units are held in place by two
tubes, with two 46mm nuts on them. These nuts are notoriously difficult to remove, and I spent hours with
a hammer, chisel and large stilson wrench tapping them around. I used an entire tin of PlusGas and a the best part of a blowtorch full of gas to get them off.
The photo shws how I got them off.
|
 |
I removed the tie rods from the knife edges, as shown and removed the suspension cylinders.
|
 |
With all of the running gear removed, I reassmebled it on the new chassis, using new nuts and bolts, supplied with the chassis.
|
 |
Next - fit the engine! I did this by myself, using a trolley jack. It was a bit of a nightmare, but I got it on eventually.
Whilst doing this I fitted a new front to rear brake pipe, and attached the old fuel line. I also fitted an inline fuel filter, between the
carb and fuel pump.
|
 |
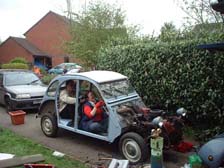
Clare and I lifted the body back on - this was actually very easy, the hardest part was lining it up correctly with the rear sub-frame.
|
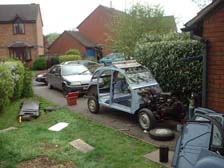 |
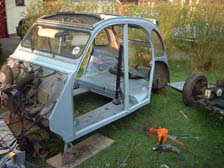
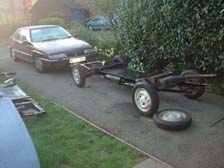
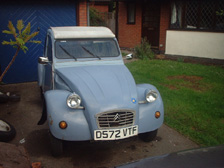
We managed it eventually, and with all the bolts tightened down, it was looking like a car again! (Note the state of the lawn - luckily the grass is shortly to be
replaced by hard standing!)
|
 |
At this point, I decided it was time to try firing her up. With a newly charged battery, I turned the key, and joy of joys, she turned and sounded healthy.
Unfortunately it wouldn't start! We tried everything, and eventually decided that the spark plugs must be finished.
The next morning I bought a new set of plugs and fitted them, but still no joy. After spending 10 minutes with a multimeter,
I discovered that there was no voltage from the points, which I traced to the ignition switch - a ha! I had connected the starter and
switch the wrong way around, so the points only got voltage when the starter was operated. I switched the leads and she started first time!
|
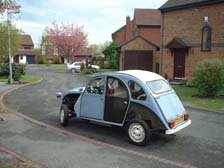 |
We had a bit of fun driving up and down the street!
|
 |
With the brakes bled, I began refitting the panels. Once I had most of them fitted (a front wing still needs some welding here) I cut the old paint back using a rubbing compound
and it came up like new. I just have to spray the replacement doors I've fitted and do some pre-MOT checks, then it's time to get her on the road!
|
 |
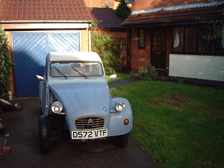
Ready for MOT! Well, I still need some new bulbs, but apart from that...
You'll notice that there's no front bumper attached, I've left it off because a) it was very rusty and b) I prefer the
look of it without it.
|
 |
April 2003 - Well I've been using the car since last summer and finally decided that it needed a respray. Since it was technically Clares car
she had final say in the color and decided on purple.
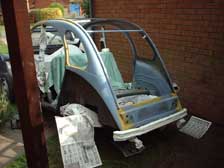
In this shot I have stripped the body and began preparing it for painting.
|
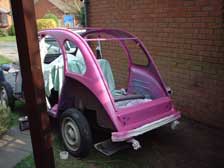 |
I chose a darkish purple colour and bought a few litres of it in Cellulose....slight panic when I began painting it, it came out pink! Oh well..
|
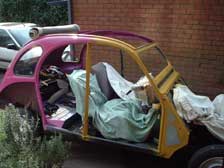 |
Here you can see I've stripped the front end of the body and primed the problem areas. Thankfully there was no rust in the windscreen
aperture, but I did crack the screen when I remnoved it, so a new one was collected from ECAS.
|
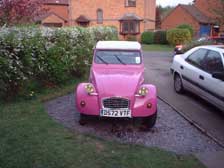 |
Here is the final result! Very eye catching... I'm getting used to the colour now and I'm happy that it is all shiny. Some new number plates and a new grill
finished the look.
You can click the image to see a big version of this shot, but put your sunglasses on!
|
